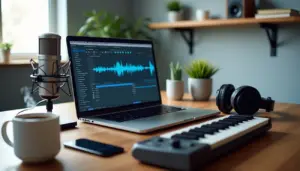
Studio quality podcast audio can make the difference between listeners continuing to listen or hitting stop within minutes. Audio quality affects whether your content appeals to your audience or gets ignored.
The good news? You don’t need thousands of dollars in equipment to sound professional. Choosing the right studio quality microphone and applying smart recording techniques can change your podcast from amateur to polished.
This piece will walk you through everything from selecting the best studio quality microphone for beginners to refining your recording environment and post-production techniques.
Choose the Right Studio Quality Microphone
Your first major decision centers on connection type. USB microphones plug directly into your computer and have a built-in analog-to-digital converter. XLR microphones require an audio interface or mixer to connect to your recording device. This difference shapes everything from your original investment to knowing how to expand your setup later.
USB vs XLR Microphones
USB microphones offer plug-and-play simplicity. Most modern units are class compliant, meaning they require no proprietary drivers to function on Windows, macOS, or mobile operating systems. USB microphones can deliver high-resolution 24-bit audio that rivals traditional studio setups in 2026. They combine the microphone, preamp, and analog-to-digital converter into a single device.
Portability becomes a substantial factor for creators recording in multiple locations. Carrying an XLR microphone, an audio interface, and multiple cables is often impractical. Many USB mics now feature onboard Digital Signal Processing (DSP) for live noise suppression and auto-leveling.
USB microphones are closed systems, though. Every component from the capsule to the digital converter is locked together. You must replace the whole microphone if you wish to upgrade your sound quality or switch to a higher-end preamp. Recording two or more USB microphones into a single computer often guides to synchronization errors and software conflicts. XLR systems remain the standard for multi-person interviews because they connect to a single interface that handles timing and levels for all inputs at once.
XLR microphones deliver studio-grade sound with low noise and better control over tone and dynamics. Paired with audio interfaces or mixers, they provide customization options for advanced podcasters seeking broadcast-quality audio. The modular nature allows you to upgrade individual components as your needs evolve.
Hybrid microphones address these limitations. Models such as the Shure MV7+ and the Rode PodMic USB offer both USB-C and XLR outputs. This allows you to start with the simplicity of a USB connection and later transition to a professional XLR interface without purchasing a new microphone. Creators who want to future-proof their investments favor these hybrid models more and more.
Best Studio Quality Microphone Options for Beginners
The Samson Q2U stands out as a versatile option at USD 70.00. This dynamic microphone features both XLR and USB outputs, allowing you to plug it directly into your computer or later connect it to an audio interface. The dual output means you can back up your recordings with ease.
An alternative is the ATR2100x at USD 50.00. There’s not much difference between the two, and availability varies depending on your region. The Blue Yeti offers four polar patterns (cardioid, bidirectional, omnidirectional, and stereo) making it suitable for different recording scenarios. The Rode NT-USB delivers near-studio-quality sound with excellent vocal clarity.
The Shure MV7 is a dynamic USB microphone inspired by the legendary SM7B, offering broadcast-quality sound with excellent background noise rejection. The Shure SM58 costs USD 99.00 for those seeking an iconic professional microphone. This handheld dynamic mic is nearly indestructible and has a built-in pop filter. The Audio-Technica 2020, at USD 99.00, provides tremendous value for vocal recording.
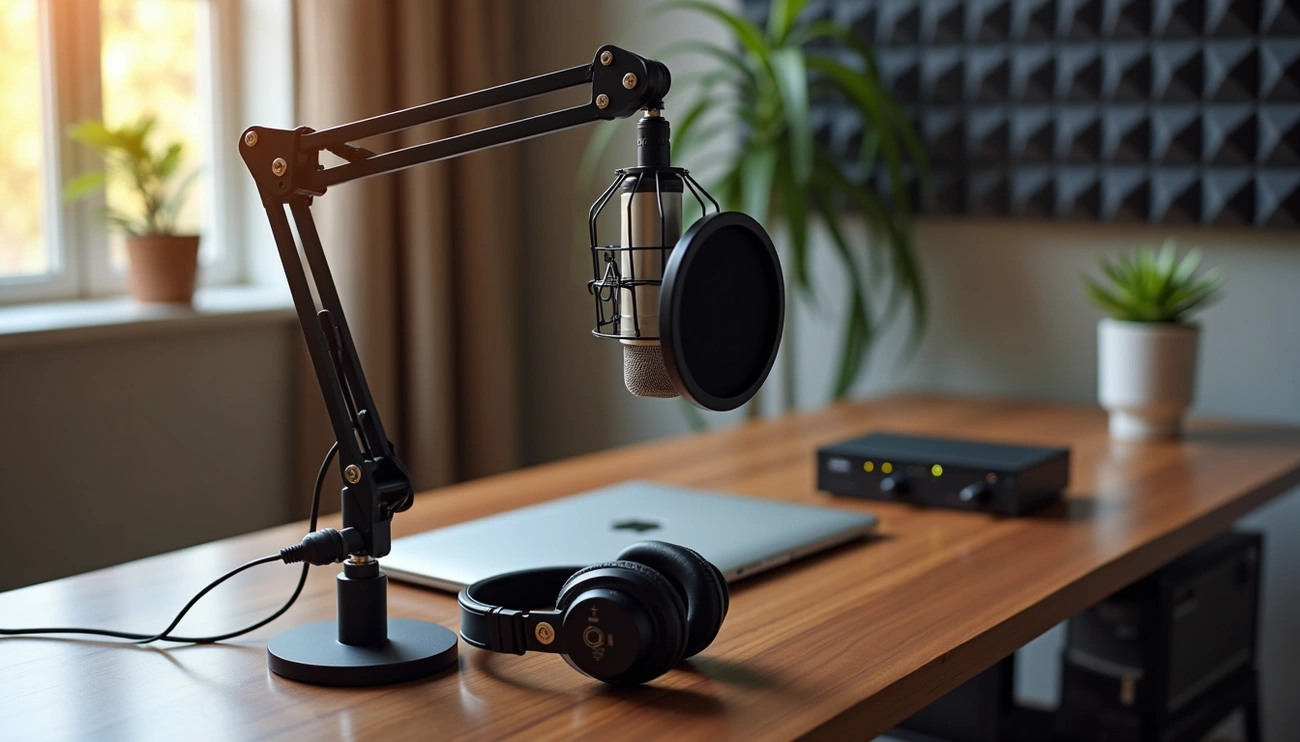
Microphone Accessories You Need
Pop filters eliminate plosive sounds caused by bursts of air hitting the microphone’s capsule. Words with ‘p’ and ‘b’ sounds are common culprits. A foam windshield can reduce these substantially, making your recording sound more professional.
Shock mounts enclose your microphone and isolate it from vibrations and mechanical noise. They prevent unwanted sounds from desk bumps or keyboard typing. A mic stand or boom arm keeps your audio levels consistent and stable throughout recording. Tabletop mic stands are affordable but more prone to picking up desk noises. Boom arms allow you to position the microphone exactly where you need it without cluttering desk space.
You’ll need XLR cables to connect your microphone to the audio interface for XLR setups. USB microphones work with just a USB cable, but XLR systems require this additional component. Condenser microphones benefit from shock mounts especially because of their sensitivity.
Set Up Your Recording Environment
Even the best studio quality microphone will capture poor audio if your recording environment isn’t configured right. Acoustic treatment and soundproofing serve different purposes, and understanding this difference saves time and money. Soundproofing blocks external noise from entering your space. Acoustic treatment manages how sound behaves inside the room.
Find a Quiet Recording Space
Small rooms with abundant soft furnishings provide better podcast recording conditions than large, empty spaces. Bedrooms work well because they contain carpets, curtains and upholstered furniture that absorb sound. You should avoid bathrooms and kitchens despite their quietness. Hard surfaces like tiles and glass create problematic reflections.
Walk-in closets rank among the best recording locations for podcasters. Clothes that hang act as sound absorbers, and the enclosed space limits how far sound waves can travel before they reflect back. A closet might seem impractical. You can record in smaller offices or spare rooms rather than open-concept areas.
Room placement matters just as much as room size. Avoid spaces adjacent to busy roads, washing machines, boilers or shared walls with noisy neighbors. External sounds like traffic and conversations in nearby rooms interrupt recordings when isolation is missing. HVAC systems do the same. You can reduce unavoidable interruptions by recording during quieter hours when your home and neighboring properties are empty.
Reduce Echo and Reverb
Reverb occurs when sound waves bounce off hard, flat surfaces and return to the microphone. Walls, ceilings, floors and windows all reflect sound energy. These reflections happen so fast in smaller rooms that they become part of your voice’s sound signature. The result is an unpleasant, boxy quality.
First reflection points are surfaces around your recording position where sound bounces back at you. You’ll see the most noticeable improvement when you treat these areas. Absorptive materials placed between your sound source and reflective surfaces reduce the sonic energy that reaches the microphone.
Corners collect low frequencies that linger longer than speech. Sound bounces faster off adjacent walls meeting at these points and generates echo that microphones capture with ease. You can block corners with furniture, bins or bass traps to reduce this buildup.
Acoustic panels at first reflection points can change how rooms respond almost at once. Ceiling treatments reduce vertical reflections, especially in rooms with hard floors. Wall panels absorb mid- and high-frequency reflections near speaking positions.
Budget-conscious solutions work well. Furniture, rugs, curtains, full bookshelves and decor all contribute absorptive and diffusive characteristics that reduce reflections. Film industry professionals use furniture blankets to dampen sound on set. You can lay them on floors, hard tables or horizontal reflective surfaces to block first reflections.
Heavy curtains or drapes over windows absorb sound from glass surfaces. Velvet or thermal blackout curtains provide added mass and block light at the same time. Large area rugs with sound-absorbing pads underneath reduce reflected sound from hard flooring.
Minimize Background Noise
Turn off air conditioners, fans and any appliances that generate noise before you record. Computers working overtime can sound like airplanes that prepare for takeoff. You can restart your device to resolve this issue.
A localized recording space around yourself and your microphone proves more effective than treating an entire room. You can create a small studio using everyday household items. A duvet draped over a clothes rack dampens background noise when you record inside. Some podcasters throw a coat or blanket over their head and the microphone to reduce room reflections.
A few seconds of room tone recorded without speaking creates a noise profile. This captures the ambient sound of your space and makes it easier to remove white-noise buzz during post-production. Headphones worn while you record help you hear issues like humming, buzzing or static in real-time. Problems fixed as they happen are simpler than those addressed during editing.
Air gaps sealed around doors and windows improve isolation more than expected. Door sweeps, weather stripping and foam gaskets around outlets prevent sound leaks. Sound blankets hung between your microphone and noise sources build an extra layer of protection. Acoustic treatment won’t eliminate podcast background noise, but it helps reduce what reaches your microphone.
Master Microphone Placement and Technique
Proper microphone technique determines whether your studio quality microphone delivers professional results or mediocre recordings. Mic placement affects voice clarity, tone, and the amount of unwanted noise captured during recording.
Position Your Microphone Correctly
The optimal distance between your microphone and your mouth sits at 2 to 4 inches. This measurement equals roughly the width of your fist or a “shaka” hand sign. Speaking too close causes your voice to sound boomy and may introduce distortion. Speaking too far captures echo and background noise.
Dynamic microphones just need close positioning at 2 to 3 inches from the capsule. These mics work well for single-voice programs and interview panels when you address them directly. Condenser microphones function differently given that they’re more sensitive and hear the environment like the human ear. Address condenser mics from 5 to 8 inches away.
Off-axis positioning reduces plosive sounds without sacrificing clarity. Angle it approximately 30 degrees to the side rather than speaking directly into the microphone’s center. This technique allows the microphone to capture your voice clearly while directing bursts of air away from the diaphragm. The air from your mouth misses the mic’s center and produces fewer harsh sounds.
Some microphones are front-addressed while others are side-addressed. Front-addressed mics need you to speak into the top of the capsule, whereas side-addressed mics capture sound from the side. Most condenser mics are side-addressed, and most dynamics are front-addressed. You position it correctly for optimal capture when you identify your microphone’s addressing pattern.
Maintain Consistent Distance
Proximity effect describes how microphones pick up more low-frequency information when you’re closer to the capsule. Your voice sounds fuller and more upfront at close range. Moving farther away reduces low-frequency content and increases reverb, creating a distant or roomy quality.
Sit comfortably with your back straight and position your mouth at the proper distance. You’ll move while talking during recording sessions. Leaning too far back or forward disrupts your audio levels and tone consistency. So remaining aware of your position prevents these fluctuations throughout recording.
Your recorded audio levels drop substantially if you move out of the optimal operating distance. Becoming distracted and leaning back happens easily during discussions. Studio quality mic recordings just need attention to physical positioning throughout each session.
Use a Pop Filter
Pop filters eliminate plosive sounds that occur when bursts of air from consonants like “p,” “b,” and “t” hit the microphone diaphragm. These plosives cause the microphone capsule to overload and result in distorted or low, airy thumps. The filter’s mesh material diffuses air bursts before they reach the microphone and produces cleaner recordings with fewer distortion spikes.
Position your pop filter 2 to 4 inches in front of the microphone. This distance allows the filter to diffuse plosive sounds while your voice remains captured clearly. Placing the filter too close reduces its effectiveness at preventing air bursts. Positioning it too far decreases overall volume and clarity.
Pop filters provide benefits beyond plosive reduction. They maintain audio levels by establishing a fixed distance between you and the microphone. This consistency proves vital for professional results and minimizes fluctuations in volume and intensity. Pop filters can help reduce sibilance—the harsh “s” and “sh” sounds that create problems in recordings.
Nylon mesh pop filters darken audio gently and make it less bright. Metal pop filters offer improved durability and are preferred in professional studio settings. Some dynamic microphones like the SM7B include built-in pop filters and don’t need additional filtering.
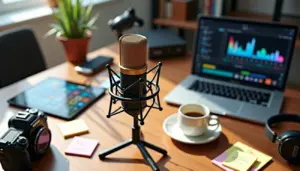
Configure Your Recording Levels
Getting your recording levels right prevents hours of frustration in post-production. Levels that are too low force you to increase weak signals and bring up background noise and equipment hiss. Levels set too high introduce clipping that damages your audio with harsh, distorted artifacts.
Set Proper Input Gain
Gain increases your studio quality microphone’s output signal to a usable recording level. Three variables determine how much gain you need: your voice’s loudness, the distance between you and the microphone, and your microphone’s sensitivity. Dynamic microphones require higher gain than condensers because they produce quieter output signals.
Speak at your normal podcast volume while you watch your recording software’s meter. Your peak levels should hit around -9 dB, with the true peak staying between -6 dB to -3 dB. The meter fluctuates as you speak. Try not to drop below -21 dB on the meter when talking.
These peak measurements should place your raw recording between -20 RMS to -24 RMS, which serves as an ideal starting point. A recording at -30 RMS sits too low and introduces noise issues from your environment and hardware. When you boost quiet recordings during editing, room reflections become present, environmental noise grows louder, and your audio interface introduces its own hiss.
Test your gain by speaking normally, then laugh loudly or raise your voice to simulate excited moments. This ensures you have adequate headroom for volume spikes without clipping.
Monitor Your Signal Levels
Make your recording software’s meter visible and large enough to see numbers in detail. Check that your meter displays peak or true peak readings rather than RMS.
Most meters use color-coded zones for quick visual reference. Green spans -36 dB to -12 dB, yellow covers -9 dB to -3 dB, and red indicates 0 dB. Your modulation should peak between -6 dB and -4 dB during recording. Bounce into the yellow zone without hitting red.
Headphones while recording help you catch issues like humming, buzzing, or static as they happen. You can hear exactly what your studio quality mic captures through monitoring. Fixing problems as they happen beats addressing them during editing.
Avoid Clipping and Distortion
Clipping occurs when your audio signal exceeds 0 dBFS (decibels relative to full scale). Digital systems cannot reproduce anything above this maximum limit. The peaks of your audio waveform get cut off and create harsh, hollow, gritty distortion.
Headroom represents the difference between your loudest recording peaks and 0 dB. A recording with peaks at -10 dB provides 10 dB of headroom for unexpected volume spikes before clipping occurs. Setting your levels just below -4 dB allows slight headroom while capturing maximum signal strength.
Once clipping enters your recording, nothing can remove the distortion. Conduct test recordings before you start your actual session. Speak, laugh, and perform as loud as you expect during the real recording. Watch every piece of equipment in your signal chain for overload indicators. Audio interfaces often include LED warning lights when levels climb too high.
Create a Noise Profile
Record a few seconds of silence in your recording space before speaking. This room tone captures the ambient sound characteristics of your environment. Recording software uses this noise profile during post-production to identify and reduce background hum, computer fan noise, and electrical interference. Clean room tone gives noise reduction tools a reference point for distinguishing unwanted sounds from your voice.
Apply Post-Production Processing
Post-production turns raw recordings into polished episodes. The processing chain follows a specific order to produce optimal results without introducing artifacts.
Edit Out Mistakes and Silence
Filler words like “um,” “uh,” and “you know” make dialog less concise and professional when you remove them. Pauses between sentences need tightening. This maintains smooth pacing and keeps listeners involved. AI-powered silence removers detect sections that meet specific silence criteria and delete them. These tools boost audio quality, save time, and reduce human error in the editing process.
Cleanvoice eliminates silence, filler sounds, mouth sounds, and stuttering from recordings. Descript shows silences in your transcript. You can remove them with a single keystroke. Automated tools can cut about 4 minutes of dead space from a 40-minute recording.
Apply EQ and Compression
Equalization shapes the frequency balance. A high-pass filter at 80 Hz removes low-frequency rumble without affecting voice warmth. The human voice doesn’t extend below this point. Frequency cuts produce cleaner results than boosts because boosts also raise the noise floor.
A reduction at 200-240 Hz prevents boominess in voices. Cuts from 300 Hz to 1 kHz reduce room reflections and make recordings sound more intimate. The 2-3 kHz range adds clarity since human ears evolved to hear these voice frequencies. Address sibilance with a de-esser rather than EQ cuts at 5-15 kHz.
Compression reduces dynamic range. It brings down loud peaks and raises quiet sections. Set the threshold where compression should begin, around -22 dB. A ratio of 3:1 to 4:1 works well for spoken content. Apply makeup gain after compression to restore overall volume. Multiple compressors at 2-3 dB of gain reduction each produce more natural results than one heavy compressor.
Use Noise Reduction Tools
Spectral subtraction analyzes frequency spectrum during silence periods to create noise profiles. Machine learning tools like iZotope RX and Accentize VoiceGate identify non-stationary noises that traditional methods miss. AI-powered reconstructive denoisers such as Adobe Enhance and Descript Studio Sound rebuild degraded audio signals. These tools work better in layers than relying on a single processor.
Master for Consistent Loudness
Podcast platforms recommend -16 LUFS for overall loudness. This standard balances audibility and dynamic range. Youlean Loudness Meter measures the file’s LUFS-I in real-time. Files too quiet won’t get boosted by platforms, which forces listeners to adjust volume constantly. Normalize your final mix to hit -16 LUFS across episodes.
Test and Improve Your Audio Quality
Testing reveals issues you might otherwise miss until publication. Listeners judge podcasts within the first 15 seconds, and 62% have stopped episodes due to poor audio quality. Small problems caught early prevent audience loss later.
Record Test Clips
You should record a 30-second test before every session. Play it back and check for distortion, clipping at 0 dB, or excessive room noise. Test recordings expose background sounds you screen out in familiar environments without thinking. Your fridge humming or HVAC running fades from awareness, but microphones capture everything. You can identify these noises early and reduce post-production work.
Listen with Headphones
Headphones pick up stray sounds and ambient noise your ears alone miss. You should turn your channel and master volume higher than normal during playback. This technique reveals subtle issues hiding in your mix. You’ll hear your voice the same way listeners experience it, and that makes quality assessment more accurate.
Compare to Professional Podcasts
Quality shows build a reference library of what strong audio sounds like. The more podcasts you hear, the easier it becomes to notice bad edits and room echo. You can train your ears through repetition. Focus on editing without distractions like checking emails or watching TV. This helps identify mistakes and clunky transitions that break conversational flow.
Conclusion
You now have all you need to achieve studio quality podcast audio without breaking the bank. The key to professional sound isn’t expensive equipment. It comes down to choosing the right microphone, optimizing your recording space and applying smart post-production techniques.
Begin with the simple things we covered and test your setup with each episode. Refine your process as you go. Compare your recordings to professional shows and keep improving.
Studio quality audio takes practice and attention to detail. Consistency matters, and your listeners will notice the difference. Your podcast deserves professional sound, and you can deliver it.